Overview
Most of the labs I’ve done in GIS classes have mostly focused on how to perform different types of analysis and learning new technical features, which is necessary to be able to display the information we want in our maps. However, I really appreciate the opportunity to bring out my creative side while making maps, to make my maps look good as well as being informative for the viewer. Information graphics and data as art is a source of inspiration for me, so I want to recreate some data art in this lab as well as use some new technical features. I was recently introduced to QGIS, and I really like this software. To familiarize myself with this program and practice using it, I decided to use QGIS for this project. A complete runthrough with exact instructions follows.
Goals
- Technical:
- Run Python script to create a GeoJSON file
- Use the “Points2One” Plugin to create a line between two coordinates.
- Creative:
- Use the style tab on layer properties and other design features to create an interesting map.
Data
- Citi Bike has 500 stations in NYC where their users can pick up a bike or drop it off after use. They also have a lot of data available ready to download https://www.citibikenyc.com/system-data such as Trip Histories, Daily Ridership and Membership data, and Real-Time Data. The data is downloadable and can be manipulated into a .CSV file.
- We are working with Trip History Data was downloaded from: https://s3.amazonaws.com/tripdata/index.html
- The .CSV file have data from one whole day, June 18 this year which gives about 49 000 trips. This is a lot of data, and it would be interesting to try to limit the data by choosing morning rush hour to see if this limited data would give more distinct patterns. Another possibility would be to see if there is a difference in the patterns on a weekday compared to the weekend.
- Custom Python Script: (citibike_split.py)
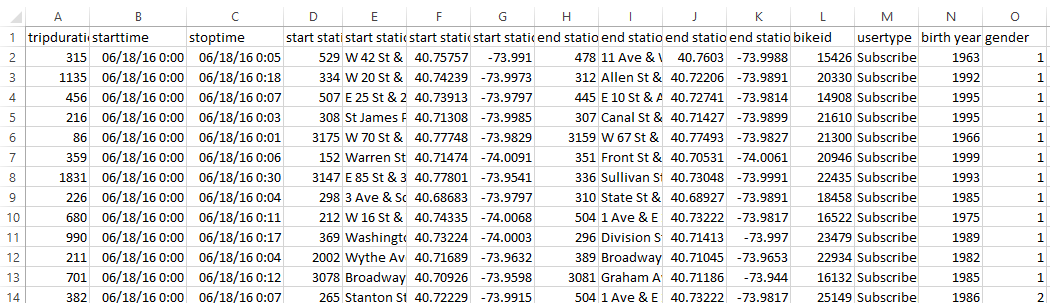
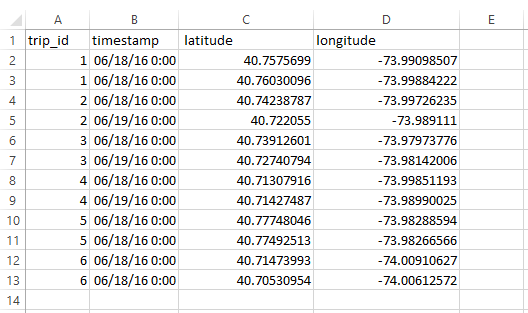
- The trip data downloaded from the Citi Bike site and extracted as a .CSV file have both start station and end station coordinates for each trip in one row. The python script manipulates the data to fit the format required by the Plugin we are using later, which requires each point to be on its own line, and each point in a specific line must have a shared unique identifier (trip_id). The images below show how the data looks when downloaded as a .CSV file opened in Excel, what the spreadsheet would look like if we would have manipulated the data manually in Excel, and as a GeoJSON file opened in an editor. The custom script is not included in this set of instructions.

- The dataset I have provided contains nearly 49 000 rows, and manipulating the data manually would just take too long.
- For more information about using Python in QGIS, read the PyQGIS Developer Cookbook. For this lab, I have mostly used the parts from Using Vector Layers.
- The output from the Python script is a file in GeoJSON format, which is a file format supporting encoding a variety of geographic data structures such as polygons and points in addition to related properties. You can read more about GeoJSON here.
- Baselayer:
- Downloaded shapefiles from US Census Beureau’s TIGER/Line service at https://www.census.gov/geo/maps-data/data/tiger-line.html
Instructions
- Open QGIS Desktop and save a new project in a suitable folder.
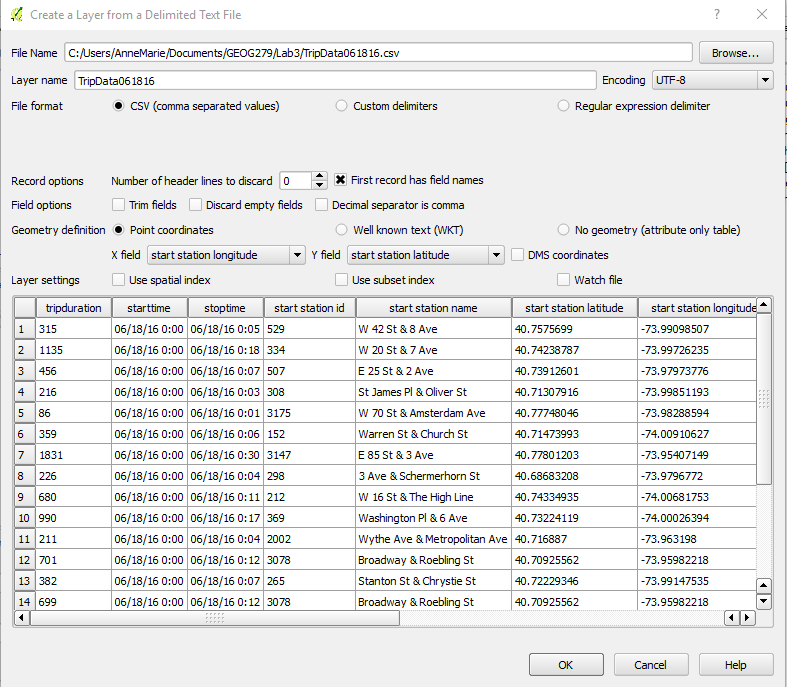
- Add the .CSV file by clicking the “Add Delimited Text Layer”
- Browse to your data folder and and find the TripData061816.csv, and enter the following parameters.
- Encoding: UTF-8
- File Format: CSV
- Record Options: First Record has field names
- Geometry Definition: Point Coordinates
- X Field: start station longitude
- Y Field: start station latitude
- Click: OK
- Use CRS: WGS 84 if the program ask for a CRS, and use this throughout. In some versions of QGIS, the program set this CRS automatically.
The layer we just added is a geographical representation of the points from the CSV file. We want to see the routes between the two points that belong to the same trip. To manipulate the data in the CSV file in QGIS, we use a Python script to prepare the data for the Plugin that will connect the two points with a new line.
- Open the “Python Console”
- Click the “Open Script” button
and browse to the “citibike-split.py” file.Doubleclick the file in the explorer window, and QGIS add the file automatically to the right place.
- If you can not find the “Open Script” button, ensure that the Editor is showing by clicking “Show Editor”.
- IMPORTANT: If you have more than one layer in your project, make sure that the layer with the CSV file is selected in the main window. The script will not run otherwise.
- Press “Run Script”
- Browse to the folder where you want to save the new GeoJSON file that will be created by the script.

The middle box in the picture above is the console log where any messages in regards to execution of the script is shown.
- When the script has run successfully, a message with the path to the new GeoJson file show up in the log window. It is now OK to close the Python Console
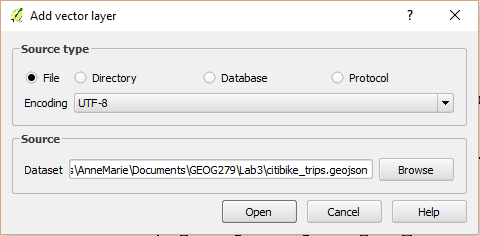
- Add the new GeoJSON file as a Vector Layer
- Source type: File
- Encoding: UTF-8
- Browse to the location of your GeoJSON file.
- Click “Open”.
The new vector layer is also a point layer and the coordinates are mostly the same as the first layer, so we might not yet be able to see any changes in the data.
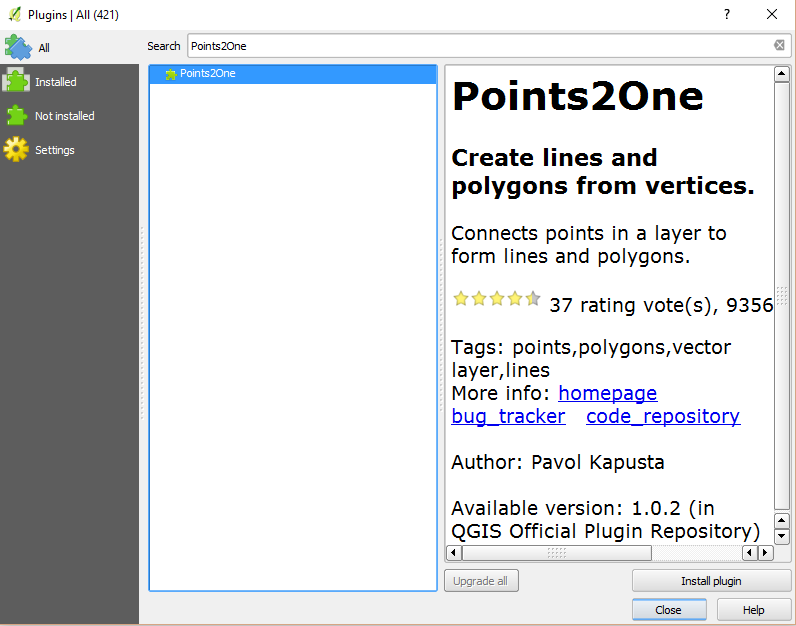
- Run the Plugin: Points2One
- The Plugin is not a standard feature in QGIS and needs to be installed.
- Go to: Plugins -> Manage and Install Plugins... on the main menu.
- Ensure that “All” is selected on the left hand bar.
- Search for “Points2One” and install the Plugin.
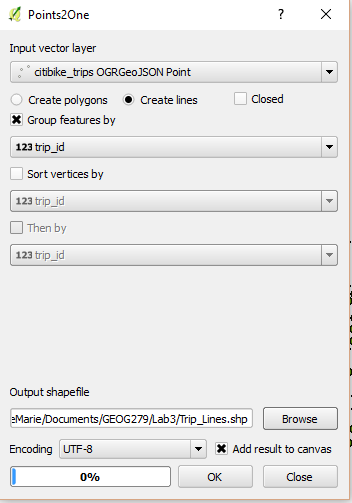
- Find the new Plugin
and run it with the following parameters (if you can not find it, it is also available on the “Vector” menu)
- Input vector layer: Use the new vector layer created from the GeoJSON file
- Check “Create lines”
- Check “Group features by” and choose the “trip_id” as the unique identifier from the dropdown menu.
- Select encoding “UTF-8”
- Browse to store the new shapefile in a suitable folder.
- Check “Add result to canvas”, and the new layer is automatically added when the tool is run.
- Click OK to run the tool. When it has finished, click Close.
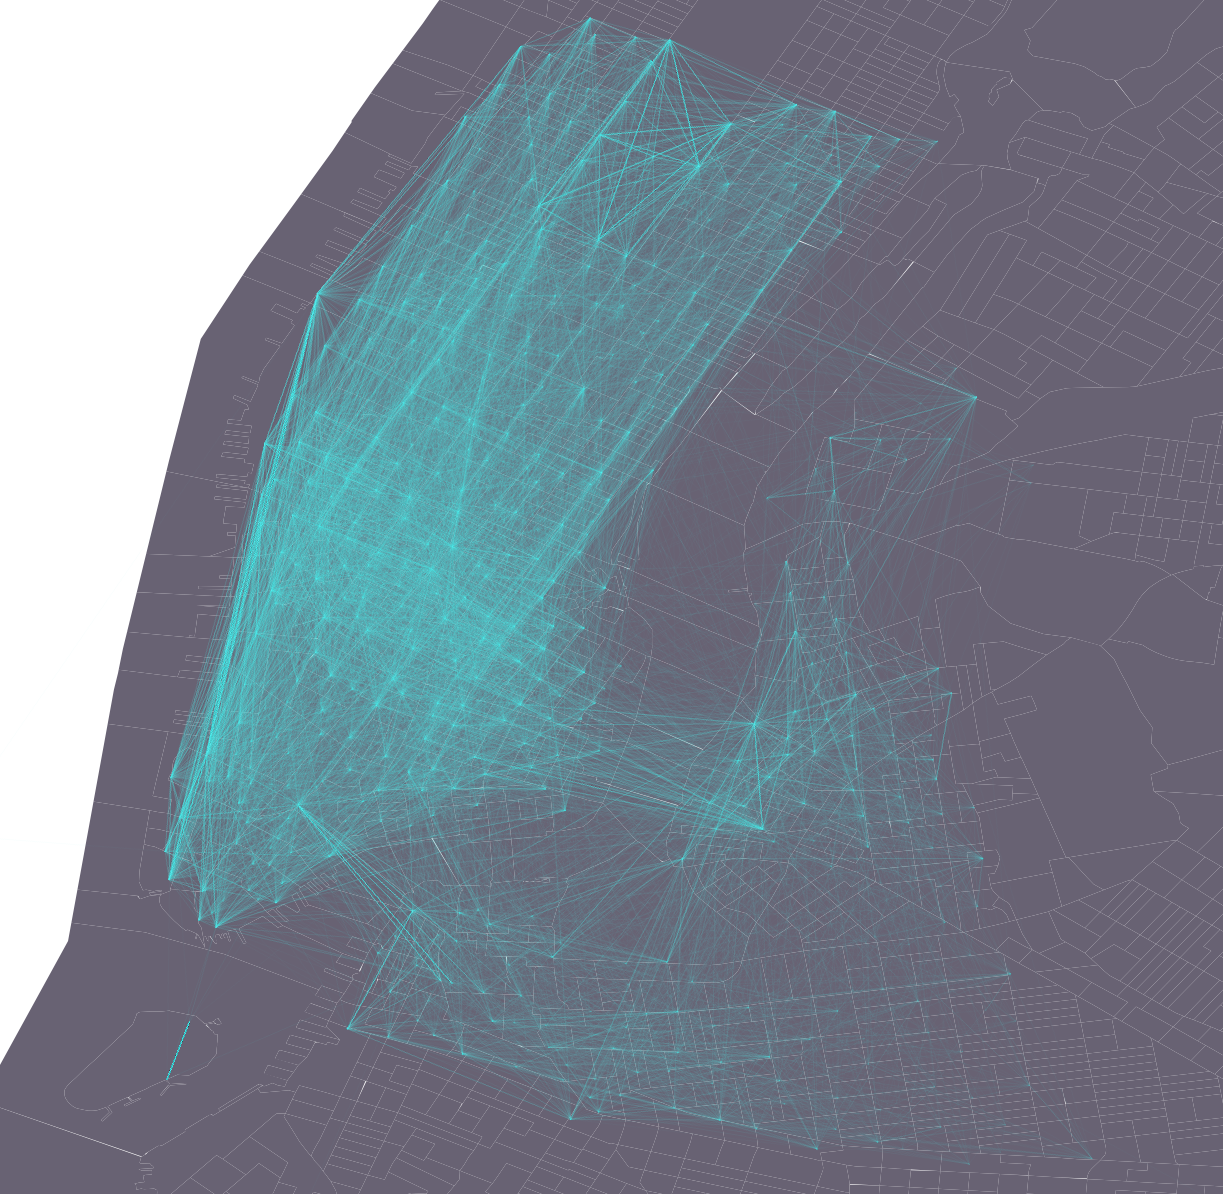
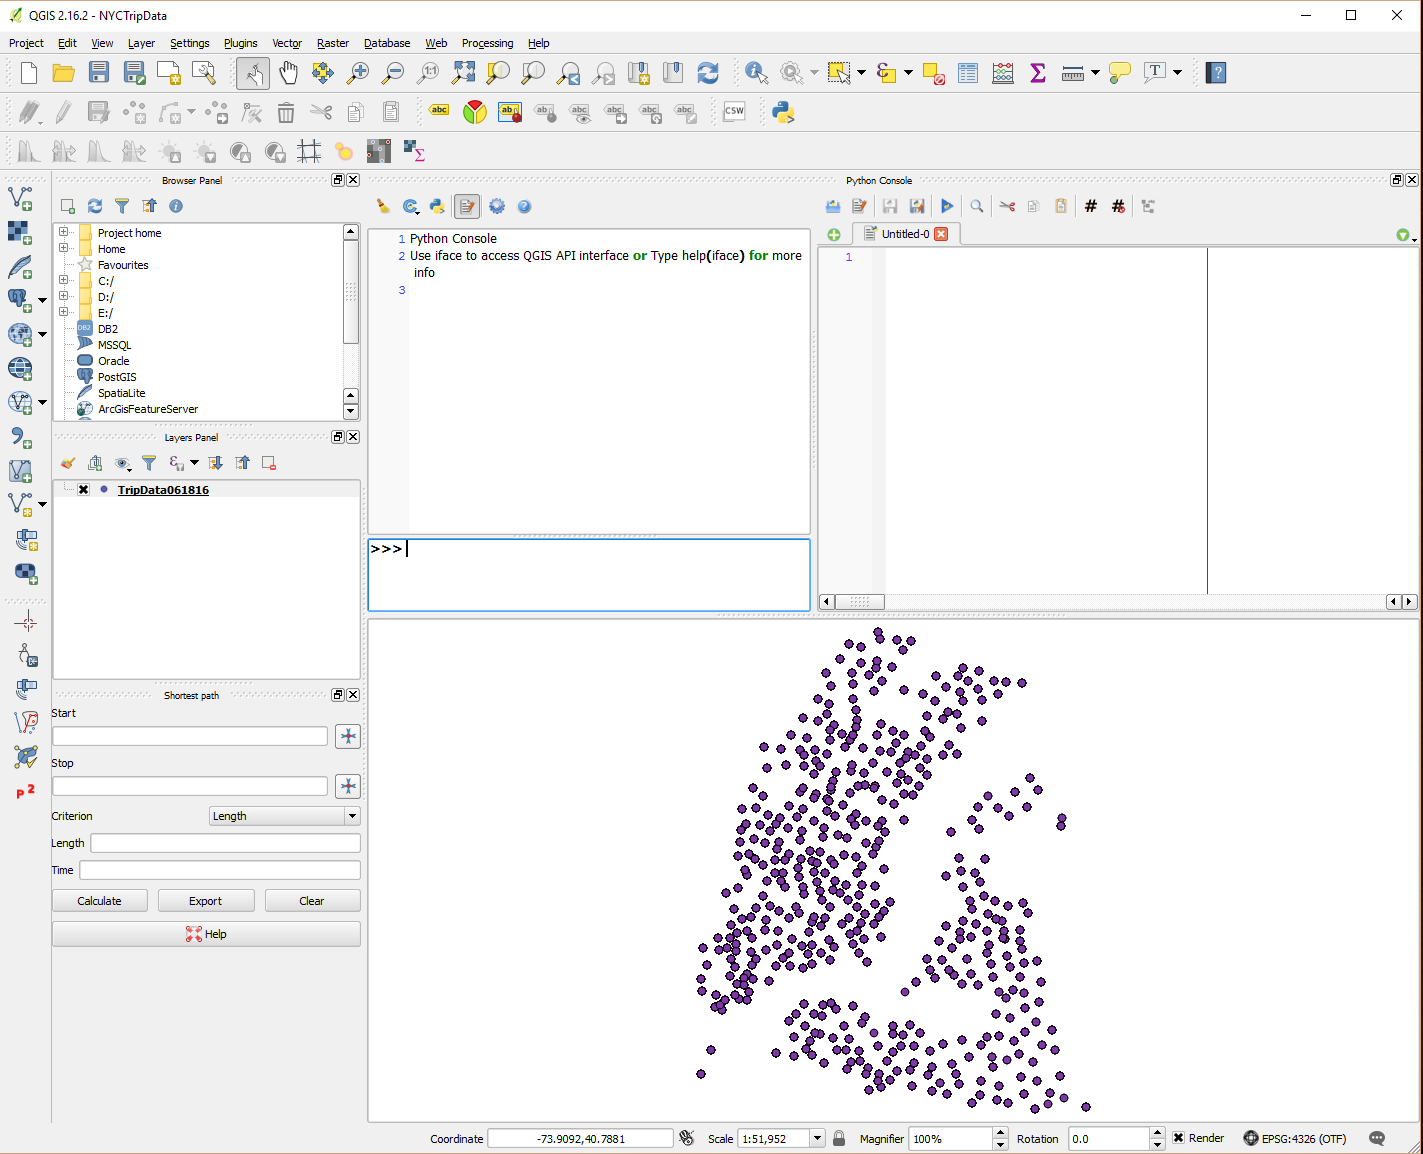
The new vector layer displays all the trips as lines that are registered in the TripData061816.csv file between the start and end points. All together all the lines in the new layer will vaguely resemble the southern end of Manhattan Island and the surrounding area of Brooklyn and Williamsburg.
Link to video tutorial:
5. Creativity
- Add base layer and change the look of the features to enhance the patterns the lines create.
- One visual effect we can do with this specific type of data is to increase the transparency of the layer with the lines.